I’m linking up with Kim Klassen’s first Texture Tuesday blog party because it’s such an awesome idea!! Her textures are just beautiful and always so versatile and adaptable! I used her “Warm Sun” texture on Pixie. It may look like spring around here with cherry blossoms and daffodils blooming everywhere but with overnight lows in the 20s it still feels like winter! I’ll take any warmth I can get!
So on with the recipe! There are two things that I did with Pixie’s picture that are kind of neat little things hidden in photoshop that you might find useful.
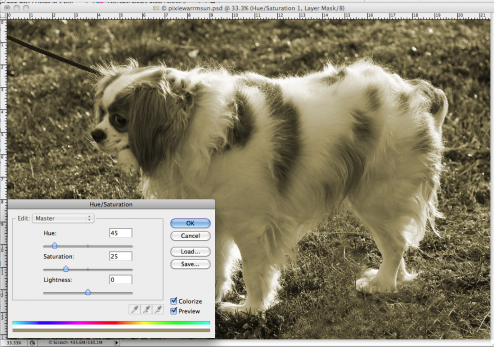
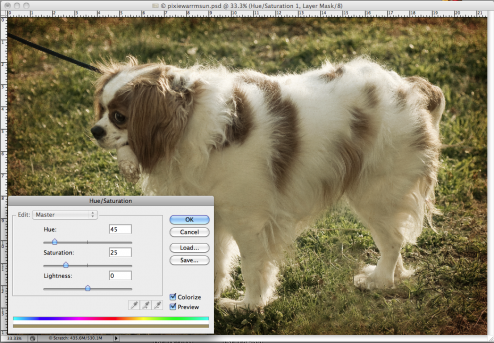
Tip #1: At the bottom of the hue/saturation adjustment layer menu there is a little check box that says colorize. I clicked on that little box and used a sepia type color to add an additional layer of warmth to the picture. It’s a quick and easy way to get a sepia look (especially if you slide the saturation button all the way to the left). But I just wanted a hint of sepia so I set the blend mode to color and reduced the layer opacity to 55%.
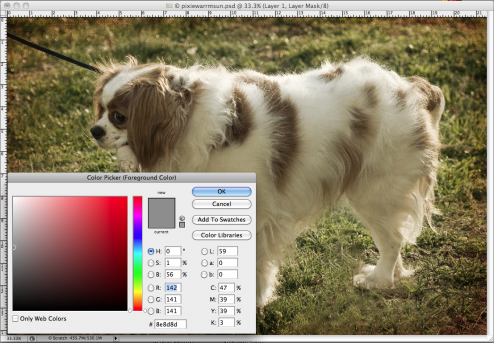
Tip #2: When you change the brush opacity and paint on a layer mask you run the risk of brushing back over a spot and creating a denser mask at that point. In other words, the paint builds up and the mask becomes darker and lets more of the background show through. An easy way around that is to paint on the mask with a medium gray — that way you can still control how much you want to see but you don’t run the risk of having portions of your mask become denser than others.
I also cropped quite a bit out of the picture in the final edit — I wanted the focus to be on Pixie and her bone and no matter how beautiful that sunlight was on her back, it really wasn’t the focus and had to go. Sometimes it’s hard to cut those pictures but I think it did improve the final composition.
Have a great Tuesday!!



kisses for pixie… and thanks so much for playing!!
wonderful edit…..
xxo, Kim
Thanks, Kim! I think she might let go of her bone long enough for a kiss! ;
)
**
pixie is a total sweetie, love the final outcome. thanks for sharing your recipe and hints.
Very nice and I agree with the crop. Thanks for the tips! I can always use them!